recipe box

favorite broiled brown sugar salmon

We’ve got a new staple around here and it’s not what you’d expect. We’re newly obsessed with broiled brown sugar salmon and I’m pretty sure we could eat it, like, 4 times a week. I know, I know. Not that obsessed but close. The best part: its easy and quick!

IMG_1127

Here’s whatcha do:

Gather a 2 pound salmon filet (skin on or off, doesn’t matter), 1/4 cup brown sugar, and 1/2 tsp each of paprika, garlic powder, salt, pepper, and crushed red pepper flakes.

Then you’re gonna heat your broiler to high and move the oven rack to the highest position it’ll go. Mix the brown sugar and spices and rub it onto your salmon. Place the filet onto a baking sheet and broil for 5-7 minutes. *If your salmon is thick (more than, say, an inch at the thickest part) you may want to move it down a bit lower after 6 minutes and continue broiling for 3 or 4 more.

Now, what are you waiting for?! Eat!


Standard
recipe box

easy gluten free key lime “pie”

IMG_1115
Pretty tasty, but very rich and dense. And just about the easiest dessert ever. Instead of using a graham cracker crust I lined a baking pan with a box of GF S’moreables. Have you had these?! They’re ah-mazing. Anyway, on top of those I poured a mixture of:
 
3 cups sweetened condensed milk
1/2 cup sour cream
3/4 cup key lime juice
and the zest from 2 limes
 
 
I baked it for about 10 minutes at 350 and then chilled in the refrigerator until we were ready to eat it. I highly recommend whipped cream or cool whip to balance it out a bit. Seriously, just make it tonight. You won’t regret it.
Standard
Baby Shower!, crafty, recipe box

Jungle Cookies

IMG_1059 I made two different types of jungle cookie prize jars for my friend’s baby shower last weekend. They were easier to fill, more fun to decorate, and way cuter in the end than I’d anticipated. They were a great hit, too! Since everyone who won one has asked for the recipes, I’ve decided to share ’em. ;)

IMG_1105

Each of the cookie jars  with a 8-10 minute bake time had:

1 and 1/8 cup all purpose flour

1/2 cup rolled oats (these are the best ever)

1/3 cup packed brown sugar

1/3 cup white sugar

1/2 tsp each: baking soda and salt

1/2 cup dried cranberries

1/2 cup white chocolate chips

1/2 cup pecans

IMG_1101

Each of the cookie jars with an 11-13 minute bake time had:

1 and 1/3 cup all purpose flour

1 and 1/3 cup rolled oats

1/2 cup packed brown sugar

1/2 cup white sugar

1 tsp each: baking powder and baking soda

1/4 tsp salt

1/2 cup chopped pecans

1/4-1/2 cup semi-sweet chocolate chips

IMG_1061

I had some cute labels printed from the fronts of the jars along with matching scallop tags.  I tied fun fabrics overlaid with tulle for added shimmer and sparkle around the tops with the scallop tags attached. Then, with a hot glue gun, I adhered fluffy, flowery tulle ribbon around the edge in alternating fushia and lilac.

IMG_1056

Standard
recipe box

what i like to call ‘Glorified (chicken!) Tortilla Soup’

IMG_1010 IMG_1012

Most of the time it doesn’t have actual chicken in it and there have never been tortillas. But whateves’ the name seems fitting in my mind. We’re pretty much eating this every night around here for, like, a month and a half now. It’s. that. good. Here’s what you do:

1. Chop up 2-3 celery stalks (really small) and 2-3 big peeled carrots.

2. Put them in a soup pot with a whole carton of chicken stock and a box of pasta noodles (we like these elbow noodles best but these are damn tasty too).*If you like your soup more soup-y, or you’re trying to save a little money, only add a half to three quarters of the noodles. If you’re feeling wild and crazy (and you happen to have a cut-up rotisserie chicken) you can add a little chicken meat too.

3. Turn the burner on high.

4. Add 1 tsp of ground pepper and 1/2tsp of each of the following: chili powder, cumin, onion powder, garlic powder. *If you’re sensitive to spice, cut the seasoning in half for a nice non-spicy flavor.

5. Once the soup begins to boil, reduce the temperature to medium and let it cook for, eh, 8-10 minutes-ish.

6. A minute or so before you’re going to serve up add a big serving spoon full of corn and navy beans.

7. Divide soup into bowls and *this is crucial* add a heaping spoonful of sour cream and a small handful of shredded cheese to each bowl.

8. Top with diced avocado.

9. Devour and enjoy.

Standard
recipe box

Nacho Fries: The Kind of Dinner You Secretly LOVE But Should Be Ashamed to Talk About

guilty dinner

But, I have no shame. It’s delicious. And easy.

And what it gives in generous embarrassment it makes up for with flavor.

Gluten free frozen fries from the grocery store or costco.

A can of corn kernels.

A can of rinsed black beans.

Some bacon pieces from the grocery store or costco.

Shredded cheese.

Fresh avocado if you’re lucky and they’re actually ripe!

Lots o’ dollops of sour cream.

And maybe some salsa.

Oh. My. Yum.

Plus, it’s the kind of guilty-pleasure meal you don’t bother to grab plates for.

Woo-hoo! Fewer dishes tonight.

Standard
recipe box

the perfect taco, with a quatemalan stamp of approval.

Lately, we’re in love with tacos over here. And we’ve perfected the taco over here.

The magnitude of awesomeness crammed into these crunchy little shells is no joke either. I’ve effectively addicted friends and co-workers to our taco concoction and it has received nothing but rave, rave reviews.

Thus, in the spirit of generosity, I’ll share our favorite dinner in four easy steps.

      IMG_0820

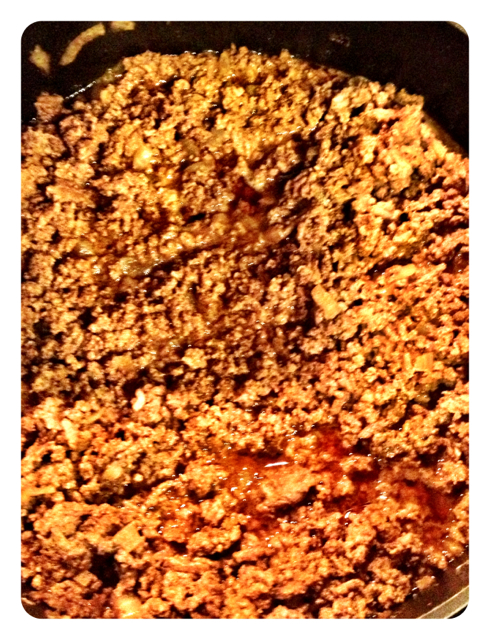
Step 1: Preheat your oven to 350. Cook the ground beef (or bison!). Chop and saute a half onion for each pound of meat. When the onion begins getting soft and fragrant, add the ground meat, 2 tbsp taco seasoning per lb, and a half cup of water per lb. Chop up the meat with your spatula so that it looks crumbly and let the meat simmer and brown stirring occasionally.

IMG_0819

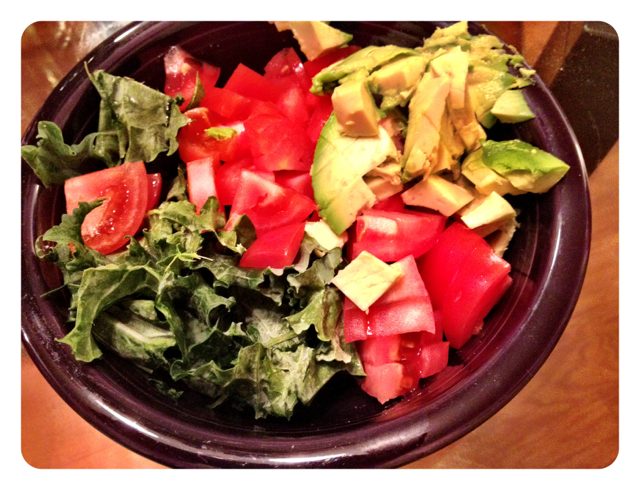
Step 2: Put your BLUE CORN taco shells on a baking sheet and pop in the oven for about 5 minutes. Meanwhile, get your fixin’s ready: chopped tomatoes, avacados, some kind of lettuce or kale, shredded cheese, sour cream….

IMG_0821

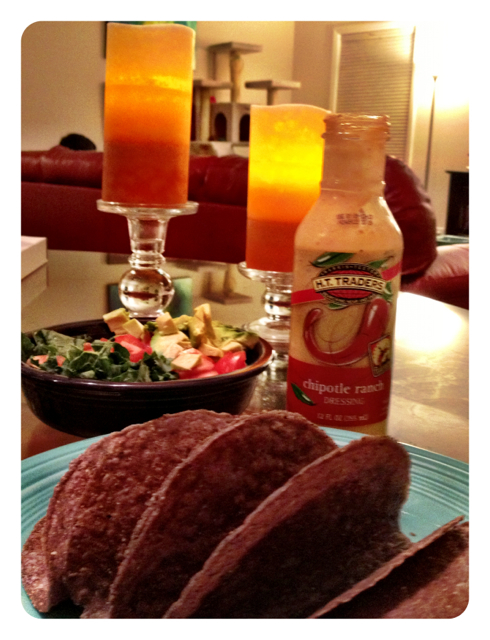
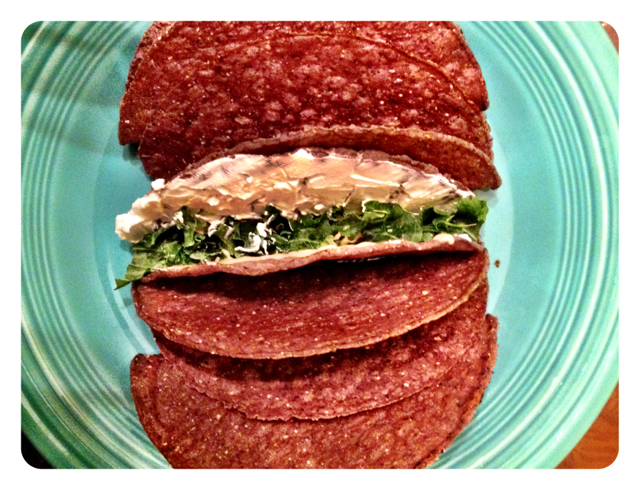
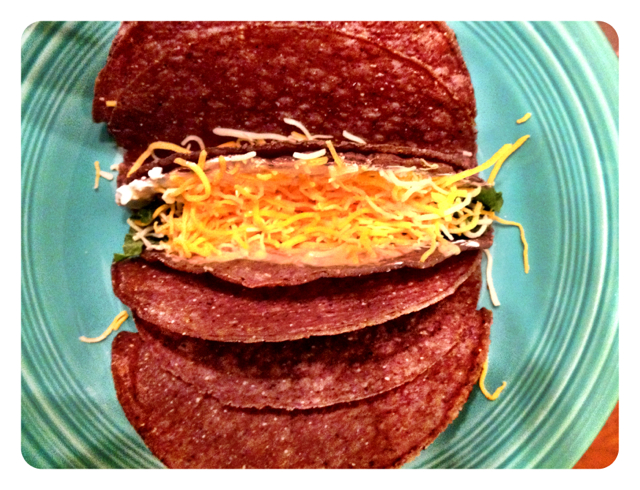
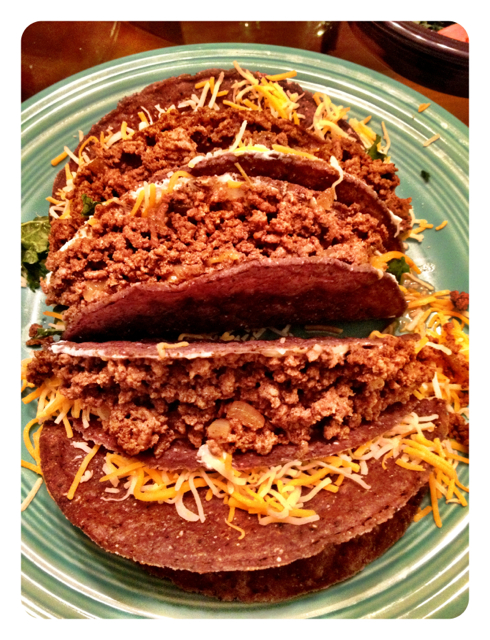
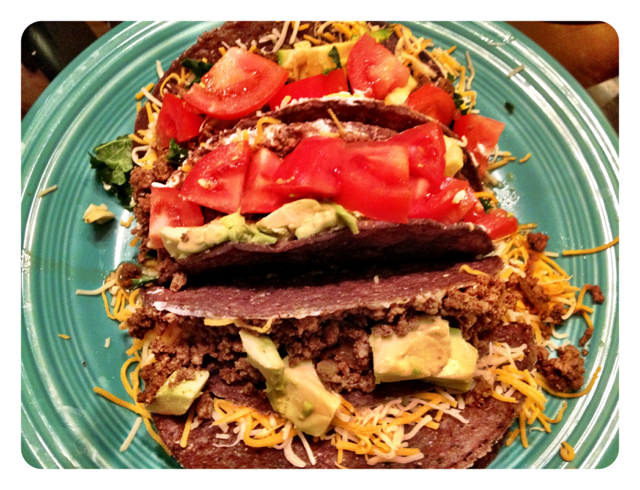
Step 3: Build your tacos. I like to fill a plate with shells, using two empty ones on the ends to hold the others up. Lather one side of each shell with sour cream and drizzle Harris Teeter Traders ‘Chipotle Ranch Dressing’ on the other side of the shell (i’m serious). Tuck a layer of shredded cheese into the nook of the shell, top with shredded kale (or lettuce)…

IMG_0818

and a little more cheese…

IMG_0817

and a spatula full of taco meat…

IMG_0814

Then top with tomatoes and avocados.

IMG_0811

Step 4: Try not to inhale tacos. Savor and enjoy.*

*Margaritas optional.

Standard
recipe box

Green Beans, Jalapeno Cornbread Stuffing, and Roasted Thanksgiving Turkey

We were so happy with how our Thanksgiving meal turned out. We were so stuffed from everything “special” we made, we never even cut into our baked yams. So, I thought I’d share the recipes we used.

First up: Green Beans with Caramelized Onions and Almonds from the Food Network.

We boiled about a pound or so of trimmed green beans in a high-sided skillet with a pinch of salt for about 5 minutes. When they were done, we ran ’em under some cold water and set them aside. Next, in the same skillet, we toasted about a third cup of slivered almonds on medium heat for a few minutes, maybe 5, stirring occasionally. Then we put a couple tablespoons of olive oil and butter into the skillet with a sweet onion (cut very, very thinly) along with a little salt and some pepper and cooked them for about 25 minutes stirring frequently. When the onions were well caramelized we added what looked like a tablespoon of thinly chopped fresh thyme and cooked the onions for a couple more minutes before mixing in the prepared beans and almonds.
They were awesome!

The biggest surprise of the night was the Gluten Free Jalapeno Cornbread Stuffing that I found {here}.

My version was *slightly* altered but mostly  the same as Jeanine Donofrio’s. For the cornbread I used Bob’s Red Mill blue cornmeal and just doubled up on the GF all-purpose flour instead of using almond flour. For the stuffing I used jalapenos and some peppers from our garden, raisins instead of currants, green onions instead of scallions, a can of drained corn, and didn’t fret too much about measurements for the veggies but rather estimated quantities by what looked about right. Again, it was awe.some. It certainly wasn’t a traditional herb stuffing but the slight spiciness of it complemented our turkey and beans really well while still standing out as a distinctive flavor on our plates.

Finally, the Roasted Thanksgiving Turkey (breast) from the Food Network’s recipe archive.

On Wednesday morning we brought a large pot of water to a boil and added a cup of apple juice, half a cup of salt, a cup of brown sugar, a couple cloves of minced garlic, three bay leaves, a couple tablespoons of black peppercorns, a tablespoon of dried rosemary, and one and a half chopped up peeled oranges. After bringing the mix to a boil we removed it from the heat, let it cool to room temperature, submerged our rinsed 8 lb turkey breast in the mixture (and added water to fully cover the breast), and put the covered pot into the fridge to “brine” for 24 hours.

Thursday afternoon we discarded the brine, rinsed the turkey, and let it soak for about 15 minutes in cold water before  wrapping it up in our dutch oven with foil over the top and cooking it in the oven at 275 for 80 minutes (10 minutes per pound). After pre-cooking the turkey we removed the foil, brushed the turkey thoroughly with a mixture of orange zest, melted butter, and finely cut rosemary from our garden and then roasted the turkey uncovered for about an hour and a half. Every thirty minutes we checked the internal temp of the bird till it reached 165 and basted it with melted butter.

Standard
food ethics, recipe box

Texas Barbecue

There’s nothing like a few years of eating vegetarian to bring out the deepest seated affection for succulent steaks, burgers, bacon, and, of course, barbecue. I still like to distance myself from the whole this-is-the-flesh-of-a-real-animal thing but, then again, I always did even before I went vegetarian. In truth, I think the violence of eating is something that humans are alone in having to grapple with and it will always affect some more than others. It’s both the blessing and the curse of modern society that the majority of people in the developed world are detached from the way their food is grown. In the United States especially people don’t know and, I think, don’t really care where their food comes from.

My turn to vegetarianism in college wasn’t really as deep and meaningful as all of that though. I eased into a vegetarian diet slowly. There were a lot meats (and meals made with meat) that I simply didn’t like the taste of. The ones I did tended to challenge my culinary talents to the point that the list grew smaller and smaller. Plus, meat is expensive.

My trials in the kitchen and with becoming a financially independent adult coincided with an academic environment in which ethics, philosophy, and politics took center stage. And so, before long Luke and I decided we would be fine eliminating meat – – as well as our contribution to the bloody side of corporate agribusiness – – from our diet all-together. And we were.

While we never intended to approach our new dietary choice like zealots, the surprising resistance to vegetarianism by a handful of family members and friends did imbue our lifestyle with a certain degree of fervor.

And then, this last Spring after a long day’s work in the garden, we both ordered bacon cheeseburgers at The Cheesecake Factory like it was nothing at all. A very fitting turn of events given the nonchalance of our journey towards a meat-less diet years before. That was the spark too. Suddenly we craved burgers and bacon like it was no one’s business. We began a quest for the best burger in Durham and did our best to make up for all the cholesterol we had avoided in the previous 5 years.

I still dislike the same meats as before. Pork? No thanks. Rib-eye steak? Nah, that’s alright. Carnival turkey leg? Umm, eww.

But I digress. This post is about Texas barbecue. I. love. Texas. Barbecue. Yes, I had forgotten about it for a while there but the weakness is back in full force. Though I only discovered recently how important the Texas part is in Texas Barbecue. I’m a Texan and as far as I’m concerned barbecue means brisket. My understanding though is a regional one for sure because Luke didn’t even know what brisket meant. I’ve asked around at work too. Co-workers, customers, vendors… I’ve found a total of 2, yes two people who knew what brisket is.

I thought, surely these people have had brisket but maybe they just call it something different. So, I asked around and did my google-ing until I’d determined where the best barbecue place in Durham is and I gave it a go. There was only one option: barbecue. By the pint. Yes! I was ready. Imagine my surprise when I got home and saw this:

In case the picture doesn’t do it justice, let me say it looked gross. Very, very gross. Luke was all, “what did you get???” with a great stink-eye expression. To be fair, it was edible… we got it once again a week later. Buttt, not exactly gooood…. and not what I would consider real barbecue.

So, without my beloved Railroad Barbecue nearby, I had to take matters into my own hands. Its hard to make great brisket without a smoker or a grill but I found a great way to approximate the real thing in the oven. And because I believe in sharing the love, I’m gonna walk you through it here so that you can make your own.

Here’s what you’ll need:

2 tbsp ancho chili powder

1 tbsp salt, I like fleur de sel

1 tbsp garlic powder

1 tbsp onion powder

1 tbsp ground black pepper

1/2 tbsp brown sugar

1/2 tbsp white sugar

2 tsp Colman’s mustard powder

1 tsp cayenne pepper, optional

1 tsp oregano, optional

1 bay leaf, crushed up as finely as possible

a 4 pound-ish beef brisket with a nice layer of fat about 1/4 inch thick.

a big cast iron skillet with a lid or a dutch oven

a handful of carrots, optional

2 cups beef stock (or beer) and about a cup or so of water

3-4 tsp liquid smoke

3-4 tsp Worcestershire sauce

*This recipe can be easily expanded or reduced. The photos below are from a 2.25 lb brisket I made the other night and just halved the other ingredients.

What you’ll do:

1. Preheat your oven to 350.

2. Make a dry rub by combining the first 11 ingredients (the cayenne pepper and oregano are optional). You can buy barbecue rubs in the store already mixed together but I think this combo not only tastes way better but is super easy too.

3. I like to rinse the brisket under cold water and then pat dry before rubbing it well with the spice mix. Be sure to season the brisket well on both sides and on the edges and use your hands to really massage it in. You shouldn’t have any of the rub left over.

4. Transfer the brisket with the fat side up to your cast iron dutch oven or skillet and roast in the preheated oven uncovered for 1 hour.

*The fat on the brisket is really important here because it not only gives the brisket a better flavor it keeps it from drying out while you cook it.

5. By now you’re going to be enjoying the most incredible aromas wafting from your kitchen. Add the beef stock (or beer) and enough water to fill the skillet or dutch oven with about 1/2-1.5 inches of liquid. Add the carrots, if using. (I usually toss in a handful of baby carrots because its easy.) Use a little less water if you’re not using carrots. Add the liquid smoke and Worcestershire sauce.

* Beef stock makes the brisket taste a little more like pot roast, beer gives it a slightly different flavor. I haven’t tried using wine yet but I’ve read that some people like to use beef stock and then substitute dry red wine for the water.

6. Lower the oven to 300, cover your cast iron with a tight fitting lid, and continue cooking for 3ish hours. At the 3 hour mark you’re probably good to go but if you’re not ready to eat yet just turn the oven off but leave the cast iron inside for however long. I’ve left it for a few hours and it was still ah-mazing.

7. I like to scrape the fat off the top before cutting and serving but its really up to you. Be sure to cut across the grain and top with some of the juice from the pan.

Standard
recipe box

dramatic macaroni and cheese, the receipe

I told you this was hedonistic. But oh-so-delicious!

Ingredients:

16 oz elbow macaroni, or whatever pasta you fancy (I like ancient harvest quinoa rotelle & it is gluten free)

1/4 c. butter, plus another melted tablespoon of butter for the topping

1/4 c. all purpose flour (regular or the Bob’s Red Mill gluten free version)

1/4 tsp. each: dried thyme, cayenne pepper, Worcestershire sauce

1/8 tsp. white pepper

3 c. each: milk and shredded sharp cheddar cheese with about 3/4 of a cup set aside for the topping (I like to mix a small block of cabot seriously sharp cheddar and a vermont extra sharp white cheddar)

1 pinch of nutmeg

1 tsp. each: salt and dijon mustard

~ 8 oz. sour cream

~12 oz. cottage cheese

~ 1/2 c. bread crumbs (or crushed Glutino crackers)

Directions:

  1. Preheat oven to 400.
  2. Bring a large pot of water to a boil and cook pasta for 8 minutes. Meanwhile, melt 1/4 c. butter in a large saucepan over medium heat. When it gets foamy, mix in flour and stir for about 3 minutes. Add thyme, cayenne, and white pepper. Then whisk in milk until smooth. Bring to the edge of a simmer.
  3. Right as your milk mixture is reaching a simmer add the nutmeg, Worcestershire, and salt. Simmer on medium-low heat for about 8 minutes, whisking regularly.
  4. Turn heat off. Add ~2.25 c. of the shredded cheese and stir until melted. Add Dijon mustard.
  5. Lightly oil or grease a 9×13 casserole. Add cooked pasta and pour the milk/cheese mixture over the top. Add the cottage cheese and sour cream. Mix these all together.
  6. Toss the bread crumbs (or crushed crackers) with the tablespoon of melted butter. Sprinkle over the top of the casserole. Cover with remaining cheese.
  7. Bake uncovered until bubble and slightly browning or about 20-30 minutes.
  8. Enjoy!
Standard
recipe box

totally baked.

When it comes to cooking, and baking in particular, I do everything like I’m killing snakes. It’s hard to bake just one thing when there are so many things I’ve never made, or made well. So I’ll have these days where that is all I do: bake a pie, bake bread, bake three different kinds of cookies, bake some kind of gooey, delicious, candy-bar… and so on. Fortunately, I managed to get in one last hurrah before Luke took an unexpected gluten-free turn towards good health.

And what did I bake??

The pie was the best, by leaps and bounds. Seriously. No competition. I really surprised myself with this one.

The bread was, eh. Ok. Actually it was quite a success but I just don’t like challah bread that much.

The cookies were good as long as we’re not talking about the snickerdoodles. The others though were fantastic. I got all three recipes from the Back in the Day Cookbook by Cheryl & Griffith Day, who I adore. On the left hand side of the platter is a batch of their ‘chocolate dreams’, the snickerdoodles are on the right, and in the upper right-hand corner are some of the ‘mexican hot chocolate shortbread’ cookies. Oh the mexican shortbreads! They are dangerously wonderful! The chocolate dreams were exactly as described – soft in the middle, slightly crisp on the edges, and very, very rich chocolatey. For me, too chocolatey. But I already know I’m weird in not being a huge chocolate fan.

The PB&J bars were also inspired from Back in the Day. They were okay. Luke and I both felt there was too much jam in the center though. Secretly, I though they were going to be the best but life is always full of surprises.

*And did I mention I’m the best boss ever because who do you think got to enjoy the other 8 dozen cookies not photographed above?? Yeah, I don’t know how to put this but I’m kind of a big deal. People know me.

Standard